


When it’s about sanding the wood floor, perhaps, the initial challenge for you would be to deal with the gaps in the floorboards. These gaps, which are one of the most common wood floor problems often develop due to age, humidity fluctuations, or climatic conditions, and can affect the overall look and feel of your floor once it’s sanded or refinished.
Hence, to protect your efforts and get the best out of them, it’s essential to address these gaps to ensure a smooth and professional-appearing result. So delve into this blog as we’ll walk you through the key steps to fill gaps in floorboards.
You’ll learn about different gap-filling techniques, the materials you’ll need, and some tips for achieving the best results.
Six Easy Steps To Fill Gaps In Floorboards
Gather Your Materials
First of all, gather all supplies required for the process. This includes the following:
- A wood filler or putty
- Wood steps
- Wood dust
- Putty knife
- Sandpaper
- Chisel
- A vacuum cleaner
- Hammer
- Safety gear (goggles, gloves, and a dust mask)
Prepare The Area
So now, prepare the area to ensure you don’t face any hurdles while filling the gaps or sanding the wood. Start by shifting every piece of furniture to a separate room. Next, inspect the floor and pick up any unwanted or sensitive items. This includes books, toys, stationery items, pins, etc.
Vacuum The Floor
Once the area is clear, grab your vacuum cleaner and start vacuuming the floor. Floor gaps and surfaces often collect dust, dirt, and debris. If not removed, these contaminants can interfere with the adhesion of the gap-filling material or compromise the quality of the sanding.
Moreover, sanding with debris on the floor can lead to scratches or gouges in the wood, affecting the smoothness and overall quality of the finish. So vacuuming before filling gaps and sanding sets the foundation for a high-quality, durable, and visually pleasing floor finish and helps protect your wood from any risk of damage.
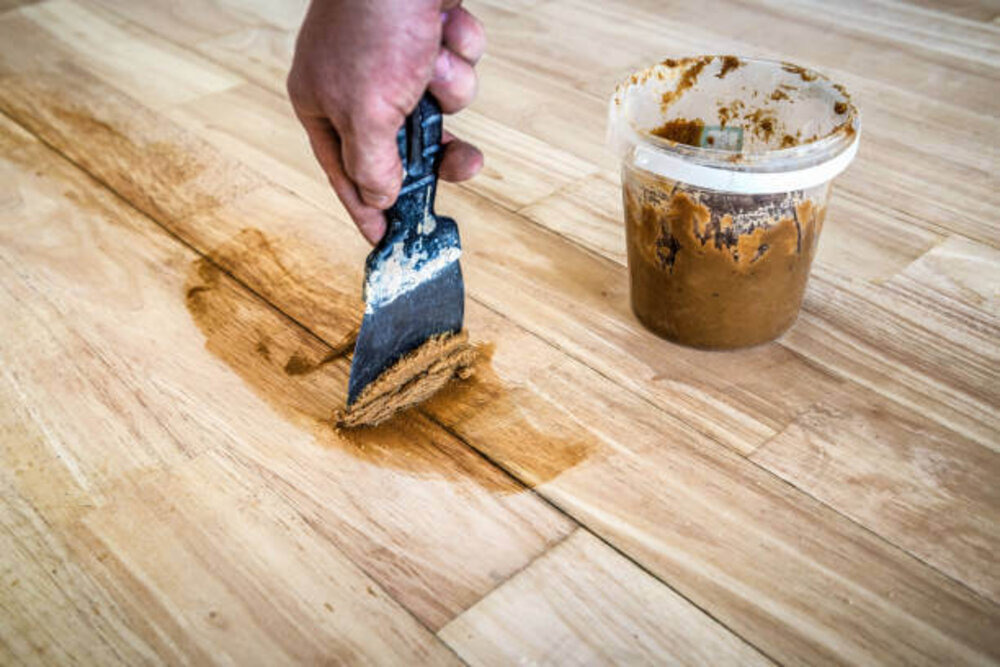
Apply A Suitable Filler
As you are done with the vacuuming part, it’s time to refill the gaps. To fill gaps in floorboards, you’ve got mainly two methods, and analysing the size of the gap, type of the wood, and the finish of your floor, you can prefer any of the two.
Wood Filler Or Putty:
Select a wood filler or putty that matches the colour of your floorboards. Now, using a putty knife or a scraper, apply the wood filler or putty into the gaps and press it firmly to make sure the filler goes deep into the gap and fills it completely.
After filling the gaps, use the putty knife to smooth the surface of the filler so that it levels with the floorboards, and lastly, remove any excess filler to avoid lumps.
Wood Strips:
Select wood strippers (also called wood slivers or fillets) that match the type of wood used in your floorboards and ensure they’re slightly wider than the gap to ensure a tight fit. Cut the strippers to the appropriate length to fit in the gaps between your floorboards using a saw or a utility knife for this step.
Then, apply a thin layer of wood glue to the sides of the stripper where it will contact the floorboards. This will help secure the stripper in place. Gently press the stripper into the gap, ensuring it fits snugly. If the stripper sticks out above the floorboard, use a chisel or a plane to trim it down so it’s even with the rest of the floor.
Let The Filler Dry
After filling the gaps, it is essential for the filler to cure properly before you sand it, so make sure you let it dry as per the manufacturer’s instructions. Generally, it takes a minimum of 2-8 hours assuming you went with wood filler or putty. However, for wood strips, you might wish to wait for 2-3 hours.
Sand The Wood
Now, as the filler is fully dried, choose the appropriate sanding equipment and start sanding the floorboards (using fine-grit sandpaper for a polished finish), including the filled gaps, to create a smooth and even surface.
After sanding, you can continue with the final finishing process. However, before proceeding, there are several factors to consider when selecting a finish, such as lifestyle or health difficulties, to ensure it suits your space. So, think about it.
Summing Words!
Sanding the floor helps revitalise your overall space, but at the same time, it is equally important to fill the gaps in the floorboards that usually occur due to climatic conditions or the flux of constant foot traffic.
Filling the garboards is quite a simple task, contrary to popular assumption; nonetheless, if you are not sure how to do it the right way, you can always go the expert route.
Experts at Sanding Wood Floors specialise in expertly refilling gaps to restore the beauty and integrity of your hardwood floors. With precision techniques and high-quality materials, they’ll ensure a seamless finish that will not only appear exceptional but will also add durability to your floors.